Thursday, July 31, 2014

Sally Hansen Diamonds & Rubies vs Rimmel Stiletto Red Comparison

~purchased by me a long ass time ago~


So I was trying to figure out a new way to organize my swatch sticks and I stumbled upon what looked like a possible dupe! Things can look different on swatch sticks compared to on real nails though so I thought I would do a comparison for you guys!

Sally Hansen Diamonds & Rubies and Rimmel Stiletto Red
Look damn near the same though, don't they?
I know I bought these a long, long time ago, when I only had a handful of nail polishes. I had thought to myself, well you have to have the basics! And whats more classic than a nice red cream (creme?)? It's actually surprising I don't have more possible dupes for this shade but the only other red I have is more of a jelly/crelly so that doesn't count.

Sally Hansen Diamonds & Rubies and Rimmel Stiletto Red
Stiletto Red (I+M) and Diamonds & Rubies (R+P)
I absolutely adore the brush on the Rimmel Lasting Pro line. Wide and curved, it makes painting nails really easy, especially for a beginner. They only had 10 or so shades when I initially bought it but they discontinued the line now :( They've since replaced the line with one called Salon Pro I believe. The good part is that you can probably find all the shades in the line on clearance in drugstores! It's been awhile, but I think the last time I was at the drugstore I spotted some. The Sally Hansen Diamond Strength line has a nice skinny brush that is good for smaller nails (like my pinky).

Look, you can see my dumb head in the shiny reflection!
I really like the bottle on the Rimmel Lasting Pro line. They line up ever so nicely in the drawers of my helmer. The top is embossed with a little crown so they look good from above too. The brush and formula for the line was always impeccable. I recall being able to wear this with one coat (!) but I used two for swatches. They will be sorely missed. Now for the Sally Hansen Diamond Strength, this is the old bottle. I think the new bottles are all faceted, like a diamond. Pretty! Also, the little rhinestone etched into the front of the bottle is a nice touch. Both polishes are 2 coats, no topcoat.

Sally Hansen Diamonds & Rubies and Rimmel Stiletto Red
In sunlight. Yup, these are dupes.
I'm not bothered having these as dupes because red is such a basic color. You can wear it pretty much all year round (well, maybe except for spring) or really, any damn time you want, color appropriate seasons be damned. Also, I may have bought knowingly bought another red because one of them might have had trouble water marbling. I was really into that back in the day. You can buy Sally Hansen Diamond Strength polishes for about $4.49 at the drugstore. The Rimmel Lasting Pro line is discontinued but they were really cheap, probably even cheaper now that they are all being clearanced out.


Wednesday, July 30, 2014

Zoya Kimber and Salon Perfect Pink Mystique Comparison

~purchased by me~

I wasn't a huge fan of the color pink previously, except in blushes or lipstick but not for clothes, shoes or nails. Then suddenly! one day my feminine side kicked in and I embraced the pink. Kind of. It's still not my favorite color to wear but I learned to appreciate it. I'm still not a big fan of purple though (strange, I know, since it seems that most nail polish addicts lurve purple). I especially love pinks that have a golden shimmer to them. I think gold accents pink quite nicely.

Zoya Kimber and Salon Perfect Pink Mystique
They look more similar in real life...
I make a point to not consciously buy dupes of nail polish. I only have one helmer and I intend to keep it that way. Inevitably, I will have some dupes, but I try really hard to keep it to a minimum; I'll even franken a polish to make it different or I'll give it away. However, today, I needn't to do either. These are not dupes!

Zoya Kimber and Salon Perfect Pink Mystique swatch
Salon Perfect Pink Mystique (I+M) Zoya Kimber (R+P)
Though it totally, absolutely looks like I have Zoya Kimber on my index and middle finger and Salon Perfect Pink Mystique on my ring and pinky, it is the other way around! Maybe that's why I thought they were dupes from just looking at the bottles? Either way, Kimber pulls more red than Pink Mystique. Two coats of each, no topcoat.

Zoya Kimber and Salon Perfect Pink Mystique swatch

Here's a pic in the shade with natural lighting. They look realllly similar here. The lighter shade at the tips of my ring and pinky are just from the free edge of my nail bed. You can't see VNL though. 

Zoya Kimber and Salon Perfect Pink Mystique swatch
Finally, Kimber shows her true (bottle) colors!
In the sun, Kimber in the bottle is finally looking like Kimber on the nail! So yeah, the shades are similar but not the same, though the golden flecks are identical in both. I think they are both worth owning! I bought Salon Perfect Pink Mystique at Walmart for $3.98 and Zoya Kimber retails for $9.00 (back in the day it was $8.00) but most likely I only paid $4.00 for it. Yay for Zoya sales!

Tuesday, July 29, 2014

Sally Hansen Triple Shine Make Waves Swatch

~purchased by me~


Hello!
Today I have a swatch of Make Waves from the Sally Hansen Triple Shine line. This is the only shade I have purchased from the line so far and I really like it!

Sally Hansen Triple Shine Make Waves

Make Waves is a green to blue duochrome. Doesn't it look lovely in the bottle? According to the sally hansen website, it will give you "the shiniest nails ever!" Now, I don't know if this was the shiniest I've ever seen but it was fairly shiny, though, I don't know if I would say it was triply shiny ;) I topcoated it anyway because I had to go somewhere and I needed it to dry quickly. This is what I used!

Sally Hansen Triple Shine Make Waves
Orly Bonder, Sally Hansen Triple Shine Make Waves, Seche Vite Topcoat
Formula was good, if a bit sheer. Though with duochromes, that usually comes with the territory. The brush was good and I hardly had to do any cleanup. I used three thin coats for the below swatch.

Sally Hansen Triple Shine Make Waves
Natural Lighting
You can kind of see some VNL in some lighting but I have fairly long nails. The shimmer pretty much disguises it. I wore this over the weekend and my left hand still looks exactly the same but my right hand had some chipping. My right hand always chips though because I'm heavy-handed when I do things. Also, the nails that chipped (my thumb and middle finger) had a case of the peelies. If you have healthy nails and are careful with your hands, I'm sure you can go longer.

Sally Hansen Triple Shine Make Waves

You see that green shade near the tips of my nails? That's what it looks like most of the time, with the blue hinting around the edges. I don't have another polish like this though by looking at pictures, I think Sinful Color's Gorgeous might be a dupe if a little more blue. Unfortunately, I think that color is either very popular or discontinued because every time I go to look for it in the store I can't find it. 

Sally Hansen Triple Shine Make Waves
Florescent lighting
I think this is a really pretty shade and worth getting! Also, I believe it is a core for this line so you shouldn't have any trouble finding it. It retails for $4.79-$4.99 though you can often catch it on sale.


Monday, July 28, 2014

Rainbow Glitter Placement Nail Art

Blah Monday. It should just be removed from the week! Here is a bright little bit of nail art to cheer you up from the Monday blues!

Rainbow Glitter Placement Nail Art
Note sun-bathing puppy in background
It looks like it takes a while but once you get into the zone of glitter placement, it actually goes pretty fast! Supplies needed:

Rainbow Glitter Placement Nail Art Supplies

The polishes from left to right is Orly Bonder (basecoat), Rimmel Black Satin, Wet N Wild Clear Nail Protector (The glue for this whole operation!) and NYC Grand Central Station (topcoat). You then need something to pick up the individual pieces of glitter with and of course, glitter! For the picker-upper, you can use a dotting tool or toothpick but then you will need a little puddle of clear coat for which you will dip said tool in to make it sticky enough to pick up the glitter. Too lazy for that? Invest in a wax pencil and there is no dipping required -- you just have to keep it sharpened to a nice point. I bought mine from Born Pretty Store which offers free shipping worldwide. The glitter is from Martha Stewart. They usually come in tubes but my sister bought some for crafting and I stole mini-baggies of each color :). You can buy them from craft stores like Hobby Lobby and Michael's or online from Amazon and the like.

Rainbow Glitter Placement Nail Art
sun-bathing puppy woke up!
There are plenty or online tutorials you can watch/read for glitter placement so I won't bore you with picture by picture shots of mine. You just basically apply your basecoat, apply your base color, then, working on one nail at a time you put a strip of your clear coat down the middle of the nail and lay your column of glitter. Doing it this way will keep your glitter placement straight. Then you put a strip of clear on the left of the middle column, place your glitters and repeat on the other side. You can also bring the glitter all the way to the edges but for that you will have to trim your glitter with clippers. I only did it for the tips and I think it still looks great! If you only need a few half pieces of glitter, you will normally find some in the container and won't have to snip them yourself. 

Rainbow Glitter Placement Nail Art
bubbly topcoat :(
Put on about two coats of top coat and you're done! I think I had the fan on when I put on my topcoat 'cause it bubbled a little. It didn't detract from the overall look though! Though it may look it, I didn't have any glitter pieces poking out. If it dulls in a few days or the glitter begins to poke out, just lay on another coat of topcoat. This manicure ended up lasting a full week for me. It's very sparkly and shiny in the sun!

Rainbow Glitter Placement Nail Art
SHING!!
Blinding, no? I think this is a really fun easy manicure. It looks like a ton more work than it actually is. Also, if you have a crappy non-dominant hand, this is practically fool-proof! It took me a little longer, but my right hand looked as good as my left! By not bringing it all the way to edges, I think it helped the manicure last longer and saved me a lot of time from not having to clip the glitter. For awesome glitter placement tutorials and manicures you can also check out the blog of the queen of glitter placement Polish All The Nails. So what do you think of this manicure? Would you like to see me do a tutorial for this? Let me know!

Friday, July 25, 2014

Blackheart Beauty Nail Polish Multi Glitter Swatch and Taco

~purchased by me~


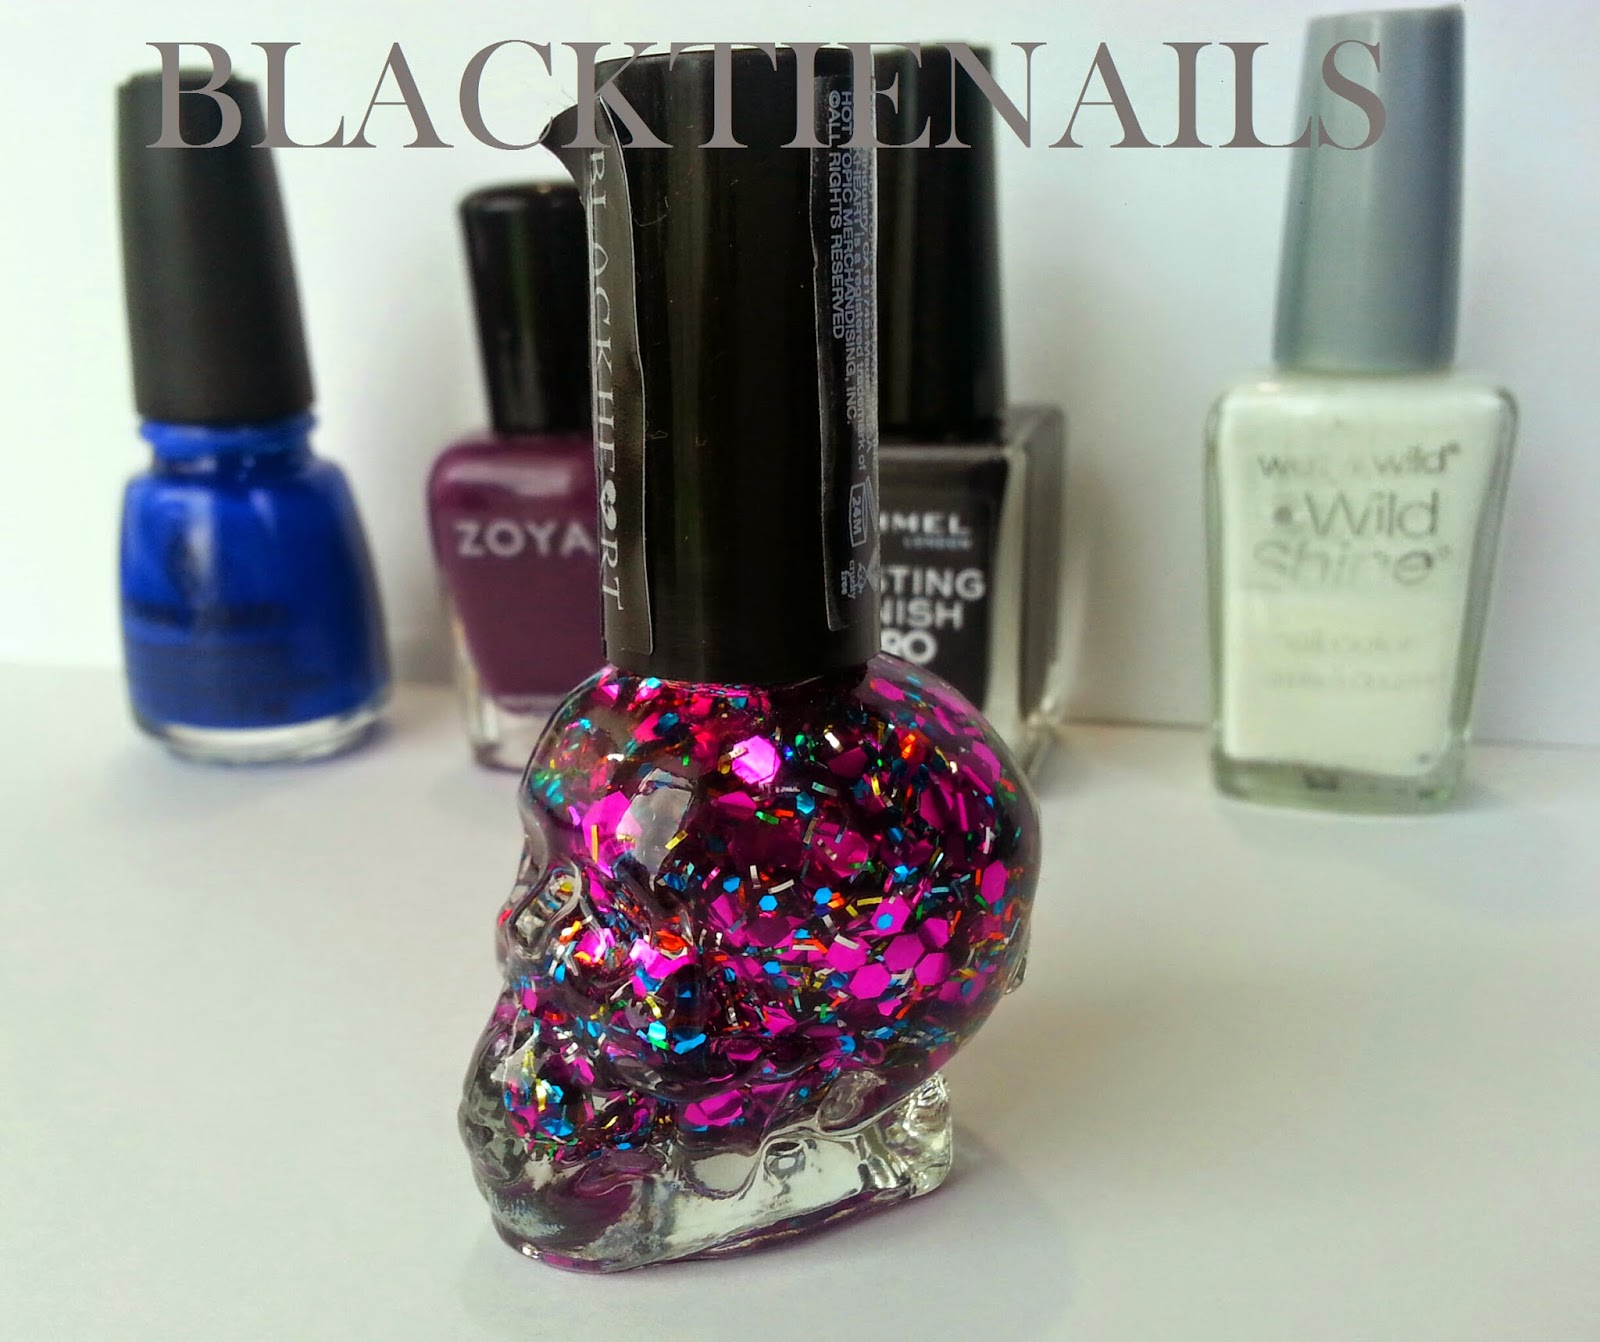
So this concludes the last of the Blackheart Beauty polishes that I own. Multi Glitter (damn that creative name) is a glitter topper with small turquoise hex glitter, large fuschia hex glitter and yellow, orange, silver, green and turquoise bar glitter in a clear base.

Blackheart Multi Glitter Nail PolishBlackheart Multi Glitter Nail Polish

The base is pretty good, if a little runny/floody. It isn't too thick though and you surprisingly don't need to fish for the large hex glitters. Since it's impossible to reach opacity on its own, I layered it over 4 polishes; a blue, a purple, a black and a white. Here are their bottle mug shots.

China Glaze Man Hunt, Zoya Monica, Rimmel Black Satin and Wet N Wild French White Creme
Man Hunt, Monica, Black Satin and French White Creme
From left to right we have China Glaze Man Hunt, Zoya Monica, Rimmel Black Satin and Wet N Wild French White Creme. Here's just a picture of the undies by themselves, for reference.


China Glaze Man Hunt, Zoya Monica, Rimmel Black Satin and Wet N Wild French White Creme swatch
Man Hunt, Monica, Black Satin and French White Creme, 2 coats no topcoat
I put one coat of Multi Glitter over each one. The glitters come out easily, no fishing required though you might have to dab a little to get the glitter where you want it. 


Blackheart Multi Glitter swatch over various
One coat of Multi Glitter over each
You can see those taco-ing glitters I was talking about. Not every single one of the large hex glitters is taco but a few will inevitably be in every manicure. You can see it best on my ring finger, over the black base.


Blackheart Multi Glitter swatch over various
One coat of Multi Glitter over each
Here you can also see them on my index, middle and ring. The index and middle one looks worse than they are. They are more of a reflective curl than an actual curl. The ring finger got it pretty bad -- there were 3 taco's on there. I decided to put on a second coat, to try to fill in some of the blank spaces.


Blackheart Multi Glitter 2 coat swatch over various
Two coats of Multi Glitter over each
You can see the taco pretty clearly on these. The taco isn't terrible but a taco is a taco. I didn't include this one as part of my blackheart swatches because some people consider taco glitter to be defective.


Taco Glitter Nail PolishTaco Glitter in Blackheart Multi Glitter

Here I picked out a taco onto a toothpick so you can see the rate of curl. And then that's what it looks like on the nail without topcoat. You might be able to get it smooth with 2 thick coat of topcoat but with tacos, I've found they usually manage to poke through anyway. Here I took the taco glitter and I placed it on the Zoya bottle cap so you can see it more clearly.


Taco glitter nail polishTaco glitter nail polish

So if you don't mind taco-ing glitter or are ok with fishing them off your manicure as you come across them, you might like this polish. It's unique, the formula is good and the glitters come out easily with no fishing required.


Blackheart Multi Glitter

So what color do you like it best layered over? I personally like it best layered over the white. It reminds me of flowers in a garden. Are you ok with taco glitter? Would you buy this? It grew on me a little bit but I don't really care for this type of glitter topper and probably will do what I said and dump it out to use the bottle to franken with. Blackheart Nail Polish can be purchased at Blackheart Beauty and Hot Topic in store and online for around $5. I bought this particular one in store and the label was all peeling off :(

Thursday, July 24, 2014

Blackheart Beauty Blue Ombre Foil Nail Polish swatches...kind of

~purchased by me~

So here is the Blackheart polish that I messed with. It's called Blue Ombre Foil which is a pretty bad name, considering it is neither ombre or a foil. Matter of fact, it was barely blue; it was so sheer. This is a duochrome flakie (a la Sally Hansen Hidden Treasure, Essie's Shine of the Times, Nubar's 2010, GOSH's Rainbow and Color Club's Snow-flake just to name a few) in an sheer wash of blue base.

Blackheart Blue Ombre Foil
Doesn't look very sheer does it? Well, that's because of this:


That's blue nail polish base that I got from TKB Trading made specifically for use in nail polish. Before I added it in, the polish actually looked pretty similar to what you are seeing now, just a little bit lighter. But on the nail, on the nail...! It was so, so sheer. So much so, that you wouldn't be able to reach opacity without layering it over something and I already duochrome flakie topcoats that I could use for that. Not only that, but because it was in a tinted blue base, it limited what colors I could layer it on top of. So I fixed it :)
A few blobs (not drops, because this stuff is hella thick) of the basic blue jellie and I transformed this once sheer flakie into a beautiful blue jelly polish with duochrome flakies.

Blackheart Blue Ombre Foil swatch
Blackheart Blue Ombre Foil, 3 coats with topcoat
I know you can see VNL here but IRL it's not as noticeable. Another picture to better show off the flakies.

Blackheart Blue Ombre Foil Swatch
Oooh, aaah
I have other polishes that are clear coats with these same flakies in it and I have a polish that has these flakies in a purple base (Layla's The Butterfly Effect). Also, I think Color Club's Uptown Girl might be similar to what I created here but I don't have it. Yet.

So what do you think of my mini franken? I really like it. If I ever get my hands on another bottle, I will do the same thing but green! Have you ever frankened a polish to make it more to your liking? I do it all the time! Especially for glitter top-coat polishes that I want to be full-coverage. The possibilities are endless!


Wednesday, July 23, 2014

Blackheart Beauty Nail Polish Swatches and Comparison Part 2

~purchased by me~

Hello!
Here is part 2 of my blackheart beauty nail polishes. I have Purple Green Iridescent, Oil Slick and Violet Tendencies.
Blackheart Beauty Nail Polish Purple Green Iridescent, Oil Slick and Violet Tendencies
From left to right, Purple Green Iridescent, Oil Slick and Violet Tendencies.


First up is Purple Green Iridescent. This is a murky plummy color with bright green shimmer running through it. Makes me think of alien skin! Formula was good, this is three thin coats.

Blackheart Purple Green Iridescent swatch
Blackheart Purple Green Iridescent, three coats with topcoat
I thought it looked awfully close to Color Club's Port-folio. It's probably also like Zoya's Adina but I don't own Adina. Here I have Port-folio on my index and middle finger and Purple Green Iridescent on my ring and pinky. Both topcoated.

Color Club Port-folio and Blackheart Purple Green Iridescent comparison swatch
Color Club Port-folio (I+M) and Blackheart Purple Green Iridescent (R+P)
 Port-folio has a better formula and is less sheer. This only required two coats. Can you tell the difference? I can't! I call these dupes! They are really similar in the bottle too.

Blackheart Purple Green Iridescent and Color Club Port-folio bottle comparison
Blackheart Purple Green Iridescent and Color Club Port-folio

Next we have Violet Tendencies. Blackheart has some really uncreative names but this one was pretty good lol. This is three coats with topcoat. It's a purple to blue glass fleck duochrome, pretty!

Blackheart Violet Tendencies swatch
Blackheart Violet Tendencies, three coats with topcoat
I thought it might be similar to Sally Hansen's Laser and Milani's Blue Lightening. Here I have Laser on my index, Blue Lightening on my middle and Violet Tendencies on my ring and pinky. They look a lot closer in the picture than in real life. They are actually quite noticeably different, it's just that they all have that purple-to-blue duochrome glass fleck to them. There are a ton of other polishes that look like this. This is just the three I have.

Milani Blue Lightening, Sally Hansen Laser and Blackheart Violet Tendencies comparison swatch
Blue Lightening (I), Laser (M) and Violet Tendencies (R+P) w/ topcoat
Blue Lightening is the most opaque of these three, needing only two coats. It's also the only one with a royal blue base. Laser needed three coats and had a more purple base. Also, it has the weakest duochrome effect. Finally, Violet Tendencies has a clearly violet base. If I recall correctly, the duochrome becomes a lot stronger if you layer Laser over a black base, which is how I usually wear it. Bottle shots!

Sally Hansen Laser, Blackheart Violet Tendencies and Milani Blue Lightening bottle comparison
Sally Hansen Laser, Blackheart Violet Tendencies and Milani Blue Lightening
Last up is Oil Slick. This has duochrome glass flecks similar to Orly's Space Cadet or Hard Candy's Beetle but in a dark evergreen base. Gorgeous! I don't own anything like it. This is three thin coats.

Blackheart Oil Slick Swatch
Blackheart Oil Slick swatch, three coats with top coat
And a bottle shot, just 'cause it's pretty.

Blackheart Oil Slick bottle
Blackheart Oil Slick

So that's the six blackheart nail polishes I have to show you. I actually have two more but I didn't include them in this mini series because one of them, I fudged with and added some more color to it to make it less sheer and the other is a glitter topper with taco-ing glitter that I'll probably dump out and use the bottle to franken with! I'll make a post about those two separately. Hope you enjoyed the swatches and comparison!
Blackheart Beauty nail polishes can be purchased at Blackheart Beauty or Hot Topic for $5 or less.


Tuesday, July 22, 2014

Blackheart Beauty Nail Polish Swatches and Comparison Part 1

~ Purchased By Me ~

Hello!
I have six blackheart beauty nail polishes to swatch and compare for you but I'm going to break it up into two posts. So the first three are Golden, Pastel Green and Glow Away.

Blackheart Beauty Nail Polish Golden, Pastel Green and Glow Away
From left to right, Golden, Pastel Green and Glow Away
I love the skull bottles that these polishes come in but some of them do seem to have a problem with keeping the polishes from evaporating. Even worse, the polish that suffered from this the most is Glow Away, one of those layered polishes that say "DO NOT SHAKE" on it. I added a few drops of thinner and gently rolled it to keep the layers from mixing and to restore it to its proper consistency.
Anyway. So first up is Golden. The formula was nice and smooth. The below swatch is two easy coats.

Blackheart Golden Nail Polish Swatch
Blackheart Golden, two coats with topcoat
I thought this polish looked very similar to Revlon's Gold Coin. I swatched Gold Coin on my index and middle finger and Golden is on my ring and pinky.

Revlon Gold Coin and Blackheart Golden Comparison
Revlon Gold Coin (I+M) and Blackheart Golden (R+P)
As you can see, while the color is the same, the difference is in the finish. Golden has a much smoother finish and Gold Coin is a bit more grainy. Gold Coin can be opaque in one coat but I used two here. You have to use two coats for Golden because the brush is a little rough and you need to "float" the second layer on so that you have a smooth finish. They look really similar in the bottle.

Revlon Gold Coin and Blackheart Golden Comparison
Blackheart Golden and Revlon Gold Coin
Next up is Pastel Green. This is 4(!) coats. The issue isn't in it's opacity, but in the formula. The rough brush doesn't really help. It goes on streaky and runny but the color is awesome, a sort of neon pastel. I got ton of compliments wearing this one. You may be able to get away with 3 careful coats.
Blackheart Pastel Green swatch
Blackheart Pastel Green, 4 coats with topcoat
I thought this looked similar to Color Club's Twiggie. I have Twiggie on my index and middle finger and Pastel Green on my ring and pinky.

Color Club Twiggie and Blackheart Pastel Green Comparison swatch
Color Club Twiggie and Blackheart Pastel Green
Twiggie has a far superior fomula, this is two easy coats. It is a shade darker (I had to color correct it in photoshop so sorry if if looks strange). But the colors are pretty close. Kissing cousins you could say. In the bottle they look really similar as well.

Color Club Twiggie and Blackheart Pastel Green Bottle Comparison
Color Club Twiggie and Blackheart Pastel Green
Last up is Glow Away, obviously the most creative name in this group lol. This is three coats. Because it's a glow-in-the-dark polish, it's grainy from the glow particles. Once again, the brush isn't very helpful. The color is a sweet pinky coral and it dries matte. I've swatched it with top coat.

Blackheart Glow Away Swatch
Blackheat Glow Away, three coats with topcoat
I thought it looked smiliar to China Glaze's Flirty Tankini. Flirty Tankini, two coats, is on my index and middle while Glow Away, three coats, is on my ring and pinky. Both are topcoated.

China Glaze Flirty Tankini and Blackheart Glow Away comparison swatch
China Glaze Flirty Tankini (I+M) and Blackheart Glow Away (R+P)
Flirt Tankini has a better formula and it also has some fine pearl like shimmer running through it which mirrors the glow particles in Glow Away. While very close, Flirty Tankini is a little darker and more of a true coral while Glow Away is more of a pink coral. Bottle shots are pretty close as well (the pink dominates the layers).

China Glaze Flirty Tankini and Blackheart Glow Away bottle comparison
China Glaze Flirty Tankini and Blackheart Glow Away

Also, Glow Away glows in the dark. I couldn't quite capture Glow Away glowing because my camera couldn't seem to take a picture in the dark. So what I did here was focus my camera in a lighted room then quickly into the dark room before it could refocus. Sorry, this was the best I could do!

Blackheart Glow Away swatch in the dark
Blackheart Glow Away in the dark

You can purchase Blackheart Beauty nail polishes at Blackheart Beauty or Hot Topic, in store or online. These retail at Hot Topic for $5 but they regularly have them on sale for BOGO free or BOGO half off.

---------------------------------------------------------------------------------------------------------------
Because of the oddly shaped bottles, I had a hard time learning how to position my fingers. I think I got it in the end but I apologize for the multiple finger positions. I'm still learning what I like and I promise I'll get better!